Zebra Plastic Card Printers.

Zebra Plastic Card Printers come in a variety of styles and price ranges, including single-sided printers, dual sided printers, and security printers

Healthy Solutions for Healthcare.

The healthcare industry benefits from barcoding. Barcoding enhances patient safety and operational efficiency.

Seagull Scientific Products

Seagull Scientific BarTender is an industry-leading label design and barcode software. Seagull Scientific also develops true Windows printer drivers for bar code and thermal printers.

MC 9190G

The Ability To Satisfy Your Company Software Requirements.

Wireless Broadband

The unrivalled Motorola portfolio of Point-to-Point (PTP), Point-to-Multipoint (PMP), and Mesh Wide Area Network (MWAN), WLAN and VoWLAN solutions make governments, enterprises, and service providers more agile by helping them deploy voice, video, and data applications right where they need them.

Showing posts with label Keyboard Wedge. Show all posts

Friday, 18 March 2011

How to use Microvision ROV Barcode Scanners with Android - Update!

Bluetooth Data Acquisition on Android

Currently TEC-IT offers two Android apps for data acquisition with Bluetooth devices:
  • GetBlue provides universal data acquisition and device communication with Bluetooth SPP, TCP and camera scanners. GetBlue communicates with serial Bluetooth devices (Serial Port Profile like SPP/RFCOMM barcode readers), TCP/IP devices and camera scanners. Captured data is displayed, saved (File, Google Docs), forwarded (HTTP, TCP) or injected as virtual keystrokes into Apps (GetBlue virtual keyboard).
  • BluePiano extends all Apps with automated Bluetooth data acquisition. This new input method provides a Bluetooth-enabled soft-keyboard. This virtual keyboard captures data from Bluetooth SPP devices (serial port profile) and forwards the received data to input fields of arbitrary apps.

Microvision ROV Bluetooth Scanners

Problem:
Some users are experiencing the following issue: once a bar code is scanned with the Microvision ROV barcode scanner the bar code data is sent over and over again.
Cause:
This problem is because the scanner by default requires an acknowledgement of the receiving party (the Android device). The current versions of GetBlue and BluePiano do not acknowledge received data, thus you need to adapt the configuration of the Microvision device.
Solution:
The required acknowledgement can be switched off by configuring the scanner accordingly.
To do this please check out the Microvision ROV PDF user manual (page 74) for the configuration barcodes. You need to set the following values:
  • ForceSerializationOverBT
    must be set to false to force compatibility mode and to disable serial numbers. Scan the Set FSOBT,0 = Force Serialization Over BlueTooth barcode.
  • BCDataACK
    must be false so no ACK is required. Scan the Set Ack,0 = Bar Code Data Acknowledgement is False barcode.
  • SeqNum
    must be false to disable serial numbers. Scan the Set Seq,0 = Sequence Number is False barcode.
  • AutoDownload
    must be true to send scanned barcodes immediately to the Android device. Scan the Set ADl,1 = Auto Download is True barcode.
The Microvision ROV scanner user manual as compressed CHM file may also be of interest. Refer to this blogpost for displaying this file on Windows 7. Use the search function in the manual and search for Bar Coded Menu Cards.

Please note that the configuration information above was posted based on user feedback of TEC-IT's Android apps. If there are any problems let us know. Thanks!

Feedback

TEC-IT hopes this article is valuable for you. If there are any questions please feel free to contact us via email or MSN (support@tec-it.com).

Tuesday, 11 January 2011

BluePiano: A New Android Bluetooth Input Method

BluePiano Bluetooth Input Method for Android
The input method BluePiano extends Android with Bluetooth data acquisition.

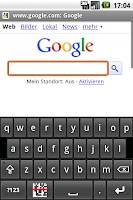
This new input method provides a Bluetooth-enabled soft-keyboard. This soft-keyboard captures Bluetooth data and forwards the received data to input fields of arbitrary apps. The data appears as entered by the user (watch the video on YouTube).

BluePiano is typically used for barcode scanning with external Bluetooth barcode-scanners or for generic data acquisition tasks (e.g. to capture raw external GPS or medical device data). English, German, French, Russian and Swedish keyboard layouts are available.

BluePiano is easy to use and provides you with connectivity feedback in the notification bar. For backup purposes BluePiano is also able to scan barcodes using camera barcode scanners (using the built-in or an external camera scanner app).

BluePiano works with all Bluetooth SPP devices (Bluetooth devices supporting the Serial Port Profile, RFCOMM). Special Android-enabled bar code scanners are NOT required. HID devices are not supported.

Video Tutorial


Installation

Download and install BluePiano from Android Market (see market://search?q=pname:com.tecit.android.bluepiano.demo). After installation a wizard guides you through the following steps:
BluePiano Logo
  1. Activate Bluetooth
    See also: Android Settings – Wireless & networks.
  2. Discover your Bluetooth device
    Please note that the Bluetooth device must be “discoverable”. See also: Android Settings – Wireless & networks – Bluetooth settings.
  3. Pair your handset with your Bluetooth device.
    You need to enter the pairing PIN on your handset. See also: Android Settings – Wireless & networks – Bluetooth settings.
  4. Adjust the Bluetooth device as input device for BluePiano.
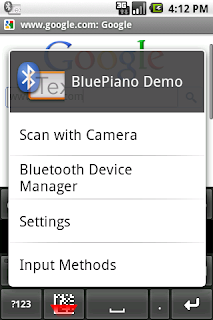
    All data received from this input device will be transformed and treated like any other manual input. You may also long tap the ?123 key on the BluePiano keyboard and then invoke Bluetooth Device Manager.
  5. Enable the input method BluePiano
    In order to use the new soft-keyboard you need to enable it in Android Settings. Confirm the security question. See also Android Settings -- Language & keyboard.
  6. Activate the input method
    Do this by long-tapping on any text field of any app. In the upcoming menu select Input Method and check the BluePiano input method. Use the same method to activate your default keyboard again.
  7. Finished!
    Now read a barcode with the external Bluetooth device (e.g. barcode scanner). As soon as the data is received by BluePiano it is entered into the current edit field. As an alternative you may press the barcode key on the BluePiano keyboard: The built-in camera scanner is invoked, the barcode is decoded and the data is entered automatically into the active edit field.

BluePiano Settings - Manual

Configure BluePiano using the installed wizard or navigate to Android Settings -- Language & keyboard and then select BluePiano.

As an alternative you may long-press on the ?123 key of the BluePiano keyboard. In the upcoming option menu select the required function.


Keyboard Options 

BluePiano Settings
  • Data Prefix
    Use the placeholders ${ENTER},${TAB}, ${BACKSPACE}, ${DOWN},${UP}, ${LEFT} and ${RIGHT} to control the cursor or input focus before the captured data is inserted into the input field of the current app. The placeholders specified above can be abbreviated with${E}, ${T}, ${B}, ${D}, ${U}, ${L} and ${R}. A multiplier specified immediately after the placeholder (e.g. ${E5}) instructs BluePiano to simulate the specified key n times (5 times the Enter key in this example).
  • Data Suffix
    Use the same placeholders as above to control the cursor or input focus after captured data was inserted into the input field of the current app.
  • Camera Scanner
    The default setting “Internal Scanner” reads bar-codes using the camera bar-code scanner integrated into BluePiano. If you prefer to select the camera scanner to be used each time, select Always ask. If a specific app is selected, the software always uses exactly this camera scanner app without asking.
  • Search Key Function
    This entry specifies the action when the hardware search key is pressed (this key is usually marked with a magnifier symbol, it is also available on the hardware keyboard): Invoke Camera Scanner opens the camera scanner when this key is pressed (you do not need to activate the soft-keyboard beforehand). In this case the search key acts as hot-key for barcode scanning.
    Choose Do nothing if you do not want to change the default behavior of the standard search key.

Bluetooth Options

BluePiano Settings Part 2
  • Manage Device
    Use this function to adjusted the Bluetooth input device. Keep in mind that the device must be paired before it can be used. See also: Android Settings – Wireless & networks – Bluetooth settings. This function is only enabled if the Bluetooth connection is not suspended.
  • Suspend Connection
    Temporarily disable BluePiano Bluetooth connectivity.
  • Suspend Timeout
    If a Bluetooth device is unavailable for more than the specified number of seconds (e.g. out of range or switched off) it will be suspended. If a device is suspended you can’t capture Bluetooth data with BluePiano. A notification is displayed and you need to re-activate the device manually. The default timeout is 120 seconds (2 minutes).
  • Vibrate on Error
    If activated, your handset vibrates in case of Bluetooth or connection errors.
  • Disaster Recovery
    Some handset models are using buggy Bluetooth stacks (firmware with Bluetooth SPP errors). This SPP bug makes it impossible to connect to a Bluetooth SPP device. If you experience this problem we recommend rebooting your phone, to restart Bluetooth manually or to instruct BluePiano to restart the Bluetooth service automatically. Please note that until now no reliable solution to this problem is available.

General Options

  • User Manual
    Link to this blog-post.
  • YouTube videos
    Link to TEC-IT’s YouTube channel.
  • License Check
    Checks and displays your current license for BluePiano.
  • About
    Displays copyright and credits for 3rd party software.

Feedback Please!

Feedback and feature requests are highly welcome. Just contact TEC-IT.

Wednesday, 1 September 2010

Barcode Scanner Keyboard for Android

Type Or Scan Barcode Keyboard

Barcode Keyboard - +TEC-IT's new soft-keyboard for Android offers integrated camera scanner support. Using this keyboard you are able to scan barcodes directly into any app, application switching or copy/paste is no longer required.

After the application was installed, this Barcode Keyboard  can be activated in Android Settings -- Language / keyboard.
Once activated you are still able to key-in text manually using the hardware or software-keyboard of your Droid. But whenever you need to enter the data of a barcode (e.g. an EAN or UPC product code, a QR-Code, ...) just press the barcode key or long press the num/alpha modifier. A camera scanner app (choose between the built-in or an external scanner) is opened, the barcode is decoded and the Barcode Keyboard enters the barcode data automatically into the current input field. No manual typing is required.

User Manual

NEW: A complete and updated user manual in German and English is available on TEC-IT's web site!

Enable Barcode Keyboard

After installing Barcode Keyboard from Android Market (Market link: market://search?q=pname:com.tecit.android.barcodekbd.demo) you need to enable the keyboard on your Droid (the keyboard must be activated too, see below!):
  1. Navigate to Android Settings -- Language / keyboard
  2. Check Barcode Keyboard and confirm the security warning

Barcode Keyboard Settings

  • Data Prefix
    Using the placeholders ${ENTER}, ${TAB}, ${BACKSPACE}, ${DOWN}, ${UP}, ${LEFT} and ${RIGHT} you can control the cursor or input focus before the barcode data is inserted into the input field of the current app.
  • Data Suffix
    Use the same placeholders as above to control the cursor or input focus after the barcode data is inserted into the input field of the current app.
  • Camera Scanner
    If you prefer to select the camera scanner to be used each time, select Always ask. If a specific app is selected, the software always uses exactly this camera scanner app without asking.
  • Search Key Function
    This entry specifies the action when the hardware search key is pressed (this key is usually marked with a magnifier symbol, it is also available on the hardware keyboard of a Motorola Droid/Milestone or Google G1): Scan Barcode Now immediately opens the camera scanner when this key is pressed (you do not need to activate the soft-keyboard beforehand). In this case the search key acts as hotkey for barcode scanning.
    Choose Do Nothing if you do not want to change the default behaviour of the standard search key.
Activate the Barcode Keyboard
  1. Open some app which uses a text input field (e.g. Gmail, then Compose a new email).
  2. Long-tap in some input field like To
  3. A menu opens, select Input method
  4. Choose Camera Keyboard

90 Seconds Video Demonstration


Update Available (V1.4 - October 2012)

In addition to numerous other improvements the updated version of the bar code keyboard supports the following keyboard layouts (The layout of the barcode keyboard is automatically adjusted to the system settings):
  • English
  • German
  • French
  • Russian
  • Spanish - new
  • Swedish
In addition the placeholders ${ENTER}, ${TAB}, ${BACKSPACE}, ${DOWN}, ${UP}, ${LEFT} and ${RIGHT} can now be abbreviated with ${E}, ${T}, ${B}, ${D}, ${U}, ${L} and ${R}. You can specify a multiplier immediately after the placeholder (e.g. ${E5}). This instructs the barcode keyboard to simulate the specified key n times (5 times Enter key in the example above).

Your Feedback Please!


Feedback and feature requests are highly welcome. Just contact TEC-IT.

P.S.: +TEC-IT  offers also another Android App named GetBlue. This app provides automated data collection and data entry for all apps. Connects to TCP RFID and Bluetooth SPP barcode scanners!

Tuesday, 29 June 2010

Android Bluetooth Reader, Keyboard Wedge

In the past few months TEC-IT developed an Android App for data acquisition with Bluetooth and TCP. The good feedback of the Android community motivated us to further enhance this app. The result: an universal data acquisition app including keyboard wedge functionality.

The app is named GetBlue. The final version is available as slightly restricted freeware as well as commercial application. Here are the highlights:
  • Android Keyboard Wedge / Virtual Keyboard:
    Captured device data can be entered into any application.
  • Supported Input Devices
  • Bluetooth SPP/RFCOMM, TCP (e.g. RFID controllers), HTTP applications and camera scanners apps like the ZXing Barcode Scanner.
  • Supported Data-Sinks:
    Bluetooth SPP/RFCOMM, plain TCP, HTPP via Get and Post, Google Docs Spreadsheets, File.
  • Data Acquisition Proxy / Data Switchboard:
    Acquired data can be forwarded to any supported data-sink.

Universal Data Acquisition App

Use GetBlue like an universal data switchboard: capture data from a data-source and forward it to an arbitrary data-sink. As an example you can adjust GetBlue to collect data from a Bluetooth barcode scanner and forward this data immediately to a Google Docs spreadsheet (refer to the drawing).

What is a Virtual Keyboard?

A virtual keyboard replaces the standard soft-keyboard of Android. Captured data is always made available to this virtual keyboard. Thus, data acquired from a Bluetooth barcode scanner or an RFID tag can be entered into any application which is accepting user input. This works completely independent from the selected datasource and the target app.

Call for Requests!

The internals of GetBlue are very simply to extend (e.g. new protocols, new devices, ...). Just let us know your requirements. Whenever possible we will provide you with a solution. Leave us a comment or send an email to office@tec-it.com.

Free Trial!

Install GetBlue using Android Market on your handset. Search for GetBlue manually or use this link: market://search?q=pname:com.tecit.datareader.android.getblue.demo.

We are looking forward to hearing from you!

Saturday, 5 June 2010

Automated Data Acquisition for Android - Update

TEC-IT (http://www.tec-it.com) published version 0.7 of the Android data acquisition app GetBlue!


GetBlue captures device data and saves this data directly to a local file, to a Google Spreadsheet or forwards it to adjustable HTTP/TCP data logging servers. Bi-directional communication is supported, server responses as well as manually entered data can be sent to the connected device.


Currently the following devices are supported:
  • Any Bluetooth device supporting the Serial Port Profile (SPP, RFCOMM),
  • Any TCP/IP device (IP-Address/Port combination), 
  • And new in this version: any installed camera barcode scanner (e.g. the ZXing camera barcode scanner, cyrket market  information
Currently GetBlue is available as freeware - the manual data acquisition functions are available unlimited. Automated data acquisition functionality (like uploading captured data to a TCP data logger) are slightly restricted. All data collection parameters are adjustable by the user via the Settings dialog. The data-source,  the target server, various data capturing parameters like time-outs, retries, data packet size, etc. are adjustable.

Android owners are using GetBlue for a variety of functions:
  • Testing app for serial Bluetooth devices
  • Automated data collection
  • Simple TCP debugger
  • Bluetooth tester for Android 1.5/1.6 or higher
TEC-IT continues to enhance and extend the app. Every feedback from users is highly welcome. Check out the current version for yourself: Android Market Link (install it directly from the Android Market using your handset).

Monday, 15 February 2010

New: Videos For Data Acquisition Software

TEC-IT announces the availability of the first product videos for the data acquisition software TWedge.

What is TWedge?
TWedge extends arbitrary databases and applications with flexible real-time data collection. Modifications of the target systems are not required! Use this software wedge with RS232, serial, Bluetooth, USB and TCP/IP interfaces. Captured data is forwarded immediately to databases, applications and ERP systems like SAP R/3. Choose between direct ODBC database access, file access or keystroke simulation (keyboard wedge).

In the first video the usage of the software wedge TWedge is explained.

The second video shows how to use the scripting features of TWedge. The scripting features enable you to modify the device data, to communicate with devices in a bi-directional way, to configure hot-key and timer-based functions and to perform basic user-interactions.

More information about TEC-IT products you will find on our youtube channel TECITSoftware.

Tuesday, 2 February 2010

Serial (RS232), TCP/IP, USB and Bluetooth Software Wedge

The service release V2.4 of TWedge (software wedge, keyboard wedge, Bluetooth wedge, TCP wedge) is now available for download. In version 2.4 an issue with failed TCP/IP and Bluetooth connections was fixed.

Check it out! Download Software Wedge.

Wednesday, 11 November 2009

TWedge V2.3 Release Candidate

TWedgeV23RCWe are announcing the new version of the data acquisition software / software wedge TWedge.
TWedge is smart middleware which connects to arbitrary devices via RS232 (COM port), Bluetooth (native!) and TCP/IP. The received data is either simulated as keystrokes, stored in a file or saved directly into an ODBC database.

Improvements

  • 0-byte awareness
    Previous versions clipped received or transmitted data after an 0x00 in the data stream.
  • HEX data display
    Incoming data can be displayed as HEX string for better debugging
  • Silent mode
    Device data display can now be turned off

Release Candidate Download

Download data acquisition software TWedge (MSI setup file for Windows). 

Monday, 9 November 2009

Reading RFID Tags with TWedge


TEC-IT's data acquisition software TWedge allows an easy implementation of RFID controller protocols. TWedge can be adjusted to communicate with RFID controllers in a bi-directional way. Reading and processing tag identifiers is as easy as reading/writing tag data!

The following TWedge script can be used to read RFID Tag IDs from EMS Datalogic RFID Controllers (utilizing the ABx Fast Protocol).

The following script performs the following functions:
1) Query the RFID controller by pressing the hotkey

2) When data is received test it for a valid response

3) Display data in MessageBox

Try it yourself - Download the software wedge for free! Keep in mind: V2.3 or higher is required!

Global Helper Functions

HEX Conversion

function encodeHex(input) {
hexOutput = "";
for (i=0; i < input.length; i++) {
hexOutput = hexOutput + ' ' + Dec2Hex(input.charCodeAt(i));
}
return hexOutput;
}

function encodeDec(input) {
decOutput = "";
for (i=0; i < input.length; i++) {
decOutput = decOutput + ' ' + input.charCodeAt(i);
}
return decOutput;
}

function Dec2Hex(Decimal) {
var hexChars = "0123456789ABCDEF";
var a = Decimal % 16;
var b = (Decimal - a)/16;
hex = "" + hexChars.charAt(b) + hexChars.charAt(a);
return hex;
}

Test for TAG ID

function IsRFIDTagID (data)
{
// 0 1 2 3 4 5 6 7 8 9 10 11 12 13
// 02 02 00 09 0F E0 04 01 00 35 7F 5E 19 03

return data.length >= 14
&& data.charCodeAt(0) == 2
&& data.charCodeAt(1) == 2
&& data.charCodeAt(4) == 15;
}

Test for TAG Response

function IsRFIDReadResponse(data)
{
// 0 1 2 3 4 5 6 7 8 9 10
// 02 02 00 06 05 31 32 33 34 35 03

return data.length >= 6
&& data.charCodeAt(0) == 2
&& data.charCodeAt(1) == 2
&& data.charCodeAt(4) == 5;
}

Send RFID READ Request

var escZero = "\\0";
var escBack = "\\\\\\\\";

function SendRFIDReadRequest ()
{
var request;
// read 5 Bytes from address 1 with timeout 2000 msec
// 02 02 00 07 05 00 01 00 05 07 D0 03

//request = String.fromCharCode ( 2, 2, 0, 7, 5, 0, 1, 0, 5, 7, 208, 3 );
request = "\x02\x02" + escZero + "\x07"
+ "\x05" + escZero + "\x01" + escZero + "\x05"
+ "\x07\xD0\x03";

// MessageBox ('WriteToDevice: ' + request);
WriteToDevice (request, 2000);

}

Get RFID Response Data

function GetRFIDDataFromResponse ( data )
{
// 0 1 2 3 4 5 6 7 8 9
// 02 02 00 06 05 31 32 33 34 35 03
var len;
var out = "";
if (data.length >= 5)
{
len = data.charCodeAt(2) * 256 + data.charCodeAt(3) - 1;
for (i=0; i< len; i++)
{
out = out + String.fromCharCode(data.charCodeAt(5 + i));
}

//MessageBox ('Len: ' + len + ', ' + out);
return out;
}
return null;
}

OnData Script

if ( IsRFIDTagID (DATA) )
{
SendRFIDReadRequest ();
}
if ( IsRFIDReadResponse (DATA) )
{
MessageBox (encodeHex(DATA) + ' (' + DATA.length + ' Bytes)');
MessageBox ('Nutzdaten: ' + GetRFIDDataFromResponse (DATA));
}

HotKey Script

SendRFIDReadRequest ();

Tuesday, 19 May 2009

TWedge Hotfix

This hotfix solves a problem when saving the settings of the software wedge into a TWI file.

The format of the TWI files was changed. This ensures that the settings can be saved even if special characters (like STX, ETX, EOT, DC1, DC2, ...) are part of the script. TWI files from previous version can be loaded without problems!

Download the hotfix here: Software Wedge for Windows

Friday, 24 April 2009

Software Wedge: TWedge V2.1 RC

Based on user-feedback a new service release of the data acquisition software TWedge is announced. TWedge V2.1 installs and runs on all current Windows-based operating systems (32 bit and 64 bit).


V2.1 introduces:
  • User Input Functionality: The new function 'InputBox' allows a user to enter data in real-time (validation is optional).
  • Clipboard Access Functions: The clipboard functions "CopyToClipboard" and "GetFromClipboard" were introduced. These functions are useful for larger amounts of data, where a simulation of keystrokes is not feasible or too slow.
  • Multiple Control Strings: Now it is possible to send a combination of key constants and modifier keys using the '+' character' (e.g.: "{CTRL+f}" or "{CTRL+SHIFT+h}"). Multiple modifier keys can be now processed through multiple control string.
  • Improved User Interface (GUI): Toolbar and application icons were redesigned.


TWedge V2.1 was released on 04-29-2009. More details are available here: Barcode Software Wedge TWedge V2.1


Readers of this blog can download the release candidate here: Software Wedge TWedge V2.1.

Tuesday, 23 December 2008

Data Acquisition Software TWedge 2.0 Released

Merry Christmas!
It's Christmas. In Austria that usually includes snow, silence (for some people), last-minute gift-shopping (for most people) and holidays. For TEC-IT customers this also means that the new version of the data acquisition software TWedge was released to the public.

New and Flexible Data Acquisition Software
TWedge version 2.0 captures data from serial, USB, Bluetooth or TCP/IP based devices and forwards this data to arbitrary applications or databases.


The highlight of TWedge is the embedded scripting language (based on JavaScript). Using this scripting language any user can embed custom logic or data acquisition functions. It is very easy to extend the functionality of this software wedge, even direct database access functions (via ODBC) and file access methods are available.

Downloads
Check out the demo version: scriptable data acquisition software
Press release: Universal Data-Acquisition Software

Example (Simple)
After adjusting the interface for data acquisition (e.g. serial port COM1, 9600 baud, 8 data bits, 1 stop bit, no parity) TWedge should be supplied with at least one script which is called whenever data is received via the configured interface.

The perfect place for this script is the the OnData() section. TWedge also offers OnStart(), OnStop(), OnTimer() and OnHotkey() - I assume you guess what these scripts are for.

A very simple OnData() script looks like this:

// start of script
SendKeyStrokes(DATA);
// end of script

The function SendKeyStrokes() simple converts captured data into virtual keystrokes. In other words: Using this simple command TWedge works as keyboard wedge. The captured data is available in the variable DATA by default (TWedge ensures correct device communication).

Example (Complex)
A more complex script writes captured data into a database. OnStart() is used for database initialization and it gets called by TWedge automatically whenever the user invokes device communication:

// start of script
// open the database
if (!myDB.Open("DSN=TWedge_Sample;"))
{
MessageBox("Could not open database TWedge_Sample!");
return;
}

// delete all records stored in a previous session
myDB.Execute ("DELETE * from tbl_Scans");
// end of script

Each time TWedge receives data from the external device it calls the function OnData(). The OnData()-code below enters captured data into the database (along with the hostename and the current date/time):

// start of script
// get the current date and time
var d = new Date();
// d.getMonth returns the month zero-based (e.g. 0=January, 11=December); thus add 1
var sDate = (d.getMonth() + 1) + "-" + d.getDate() + "-" + d.getFullYear();
var sTime = d.getHours() + ":" + d.getMinutes() + ":" + d.getSeconds();

// build the INSERT statement
var insert = "INSERT INTO tbl_Scans (ProdID, ScanDate, ScanTime, Host) VALUES (";
insert += "'" + DATA + "', ";
insert += "'" + sDate + "', ";
insert += "'" + sTime + "', ";
insert += "'" + "localhost" + "');";

// execute the INSERT statement
var nRet = myDB.Execute(insert);
if (nRet < -1) MessageBox ("Error during INSERT:" + myDB.LastError); else if (nRet == -1) MessageBox ("This should not happen when executing an INSERT statement"); else MessageBox (nRet + " record(s) inserted!"); // end of script


Nice - But I don't know JavaScript!
Don't worry. TWedge comes with predefined scripts for common usage scenarios (e.g. keyboard wedge functionality). Just select the template which matches your requirements. Or contact TEC-IT for support.

End of Post
Merry Christmas and a Happy New Year!

Saturday, 8 November 2008

Software Wedge - Data Acquisition Software

Beside barcode, labeling and reporting software TEC-IT offers software tools for data acquisition. One of these tools is named TWedge - a software wedge.

The main purpose of such a software wedge (also named keyboard wedge) is to transform data read from an external device (connected via RS232, RS485, serial, COM, USB, Bluetooth or TCP/IP) into keyboard strokes. These keyboard strokes are then be forwarded to arbitrary applications. Using such middleware it is possible to automate data acquisition tasks - even with software applications which are not able to communicate with devices directly (e.g. like using a serial barcode scanner with Microsoft Excel).

The existing version of TWedge fulfills its main purpose perfectly. Serial data is captured and forwarded to applications. But customers often require powerful possibilities for adjusting and modifying data prior it is forwarded to a target application.

The solution to this problem? Scripting!

The new version of TWedge supports JavaScript(tm). Thus customers are able to do more or less everything with TWedge. Received data can be transformed, modified, checked and adjusted. But the most interesting point is, that TEC-IT extended JavaScript with direct database and file access. In other words: the upcoming version of TWedge enables users to store data directly into ODBC databases and files. It is also possible to implement complex application logic in JavaScript.

If interested just contact TEC-IT. A release candidate is available for testing!